How to install an after-market car stereo
>These instructions may seem daunting! But if you want to do it yourself, here’s everything you need to know:
What’s an “after-market” stereo?
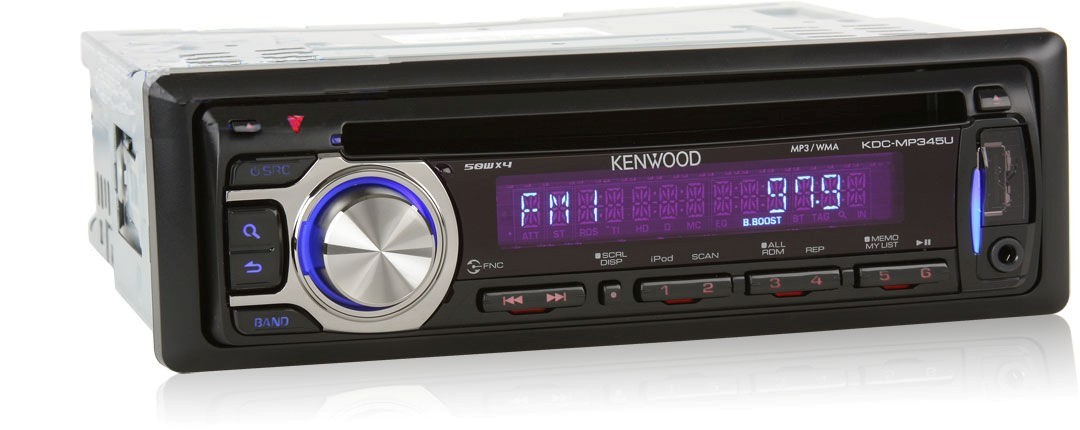
An “after-market” car stereo is one that you buy and install in your car after you’ve purchased the car. The stereo that came with the car when it was manufactured is known as an “OEM” stereo (“original equipment manufacturer”).
What brand should you buy, and where should you buy it?
There are lots of good after market stereos out there, but there’s also lots of crappy ones. StereoMan advises you to go with a well-known brand such as Pioneer, Kenwood, or Sony. You should spend at least $70 to get one of decent quality with minimal features.
There are lots of reputable online merchants you can buy from, or you can get your stereo at any “big box” store. Be careful when buying online to choose a seller who is authorized by the manufacturer, or else the warranty will not be valid. If you are unsure, you’d be better off buying from a local retailer. Or, you can buy a Pioneer stereo directly from StereoMan.
What other accessories are needed for the installation?
You’ll need two, maybe three, other items to complete your installation: a fit kit, a wiring adapter, and maybe an antenna adapter. These items can also be purchased online or at your local “big box” store – or from StereoMan! Some online merchants provide these items at no extra cost.
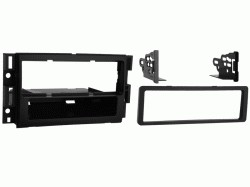
A fit kit is a plastic assembly that matches your car’s console to a standard after-market stereo. Fit kits are generally packaged in a plastic bag or blister pack, and each kit will be compatible with a range of vehicle years and models; e.g., 1998-2002 Honda Accord, or 1995-2008 Ford Ranger and Mazda pickups.
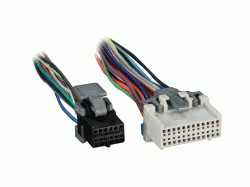
A wiring adapter will allow you to plug your after market stereo directly into your car’s wiring system. The wire colors on the adapter will exactly match the wires that come with your after market stereo, making the job of connecting the wires much easier and less prone to errors. Like the fit kit, you’ll find the wiring adapter in a plastic bag or blister pack, and a given adapter will be compatible with a range of vehicle years and models.
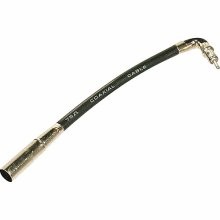
Virtually every after-market stereo has a standard antenna connection. An antenna adapter may be needed if your vehicle has a non-standard antenna connection. Almost any GM vehicle or VW has a non-standard connection. The GM antenna adapter is the one pictured here. Often the wiring adapter will come with one if it is called for. If you’re not sure, ask your retailer!
Each of these items will cost you about $10-$20 at your local “big box” store. You may find them for less online, but don’t forget to factor in the shipping cost!
Removal of the original stereo
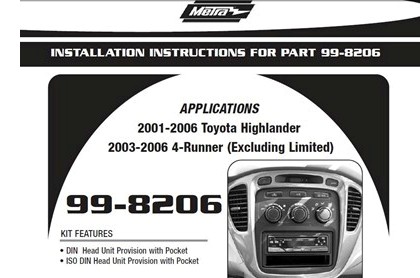
The fit kit will come with a pamphlet that describes how to disassemble the car’s console and get the original stereo out. Some cars are very easy, some are not. It helps to have a wide, flat bladed tool such as a putty knife or stiff spatula to pry apart the pieces. You may also need a #2 Phillips screwdriver, or a socket wrench, as many OEM stereos are bolted into the car.
Wiring
Once you’ve got the old stereo out, the next step is wiring the new stereo’s wire harness to the wiring adapter. For this you will need a wire stripping tool and a roll of electrical tape. Strip about two inches of insulation from the end of each wire of the stereo’s wire harness that has a matching color wire in the wiring adapter. Do the same for each wire in the adapter that matches color with the harness. Wires that do not match color will not be used. For best results, fold these wires back and tape their ends.
Next, twist the ends of each pair of matching color wires together and cover them individually with tape. Some installers use other methods of connecting the wires, but StereoMan suggests this method because:
A) twisting the wires together provide much more connected surface area than crimp splices;
B) twisted connections aren’t brittle like solder connections, so they are not subject to breakage;
C) it’s fast and easy: and,
D) if you make a mistake, you can simply pull the wires apart and slide the tape off.
Once you’ve connected and taped each wire, plug the harness into the radio and the adapter into the car. Turn the key in the ignition to the “ACC” position and confirm that the stereo comes on and sound comes from all four speakers. Then, turn off the key, unplug the adapter from the stereo, grab the whole bundle of wires, and wrap a generous amount of tape around them at the point where the connections were made.
Installing the new stereo
Prepare the fit kit by following the instructions in the pamphlet that came with it that apply to your particular vehicle. You may need a pair of heavy shears, a pocket knife, or a box cutter to cut plastic tabs from the fit kit. Some kits also come with small machine screws to hold parts together.
Once the kit is ready, insert it into the hole in the console where the OEM radio used to be. There may be screws or bolts to hold it in place. If so, there will be corresponding holes for them in the fit kit.
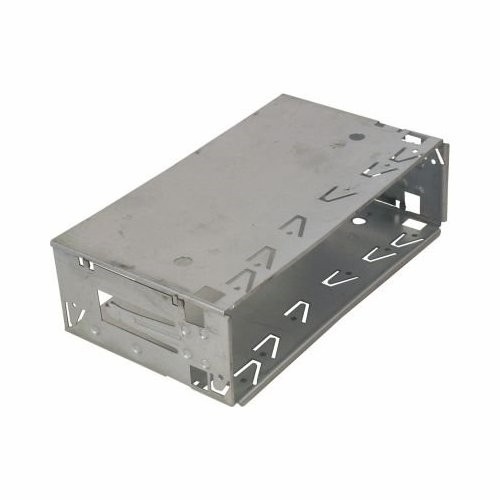
The DIN cage
Your new stereo will come with a metal frame around it that is known as a “DIN cage”. You have to pry a release on either side of the DIN cage to get it off of the stereo and affix it to the fit kit. The stereo also comes with a pair of handy release tools for that purpose.
The cage will fit snugly into the fit kit. But before you snug it in, pull the wiring adapter and antenna wire through the cage. It’s easier to do that now than later! Once it’s in place, use a small screwdriver or similar tool (StereoMan uses a pair of curved hemostats) to pry down on the metal tabs around the perimeter of the cage. This will prevent the cage from slipping out or tilting from the weight of the stereo.
Your installation instructions may indicate that your car stereo will fit in what is called “ISO Mounting”. That means you don’t use the DIN cage at all, instead the new stereo bolts directly into the OEM mounting brackets.
There is no upside down. The din cage is perfectly symmetrical, either way, top and bottom, left and right. You can’t put it in wrong!
Getting the radio in
Finally, you’re ready to put the new radio in the dashboard! First, plug the wiring harness and antenna wire into the back of the stereo. Then you’ll have to finagle the wires into the console so the bulk of the wires is either above or below the stereo. There’s hardly ever enough room right behind it. This is the most frustrating part of the whole job! You may have to install and remove the radio from the DIN cage several times before you get it right. When you’ve got it right, the radio will slip all the way into the cage with just a little bit of pressure, and lock down to the tabs with a distinct “click”
The trim ring
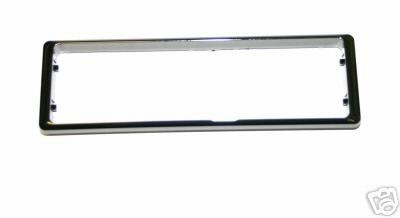
Your new stereo came with a plastic ring around the face called a “trim ring”. This ring snaps right on, after you’ve got the radio into the DIN cage. it has four or six tabs that hold it in place. It should pry off pretty easily if you need to get the stereo back out. Hang on to those two release tools, just in case!
Congratulations! You’re done! You’ve read all the instructions. Now go for it!
![]()