Speaker Rebuilding in 12 Easy Steps*
What do you do then? You could just throw them away and buy a new set. But if you really love the way they sound, it’s going to be really hard to get used to something different. Or, you may be one of those people who hates to throw something away when it could be easily restored to like-new condition. Good for you! StereoMan says “There is no away.”
How can you tell if your speaker foams are giving way? Take the grille off of the speaker. It should pop off fairly easily by prying at the corners. Look for cracks or tears in the foam. If they’re really far gone, you’ll see holes where material has fallen away.
Materials needed: Phillips screwdriver (sometimes allen wrench), flat blade screwdriver, putty knife or paint scraper, disposable rags or paper towels, acetone, round lid or plate of appropriate size, magic marker, one sheet of adhesive-backed paper labels, replacement foam surrounds and speaker repair glue (or “speaker rebuild kit”), painter’s masking tape (the blue stuff), nylon cable ties, jeweler’s screwdriver or dental pick
Step 1: Remove the speaker from the cabinet. Usually there are four or six screws holding it in, typically phillips heads but sometimes allen heads. Then you’ll have to pry the speaker out with a flat blade screwdriver or similar tool. It may take some effort as the speaker is often very tightly fitted. Work your way around the perimeter applying steady pressure until the seal breaks. Sometimes there will be a sealing ring under the speaker. Hang onto it! Also note the difference between the two wires on the speaker. They may be different colors, or one may have a stripe. One of the terminals on the speaker will have an identifying mark. Note which wire goes where.
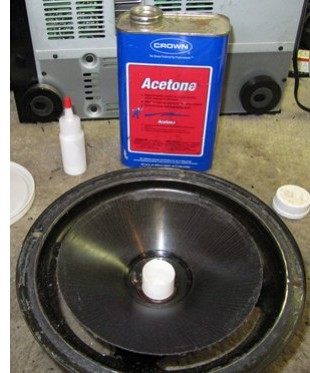
Step 2: Remove the old foam. You may want to change your clothes first, and put on a pair of gloves. This is the nasty part. You’ll need some acetone, a putty knife or paint scraper, and lots of paper towels or rags that you won’t mind disposing of afterwards. They will be ruined.
Use a towel wetted with acetone to rub away the foam residue from the edge of the speaker cone. If it doesn’t come off easily, use more acetone and take more time, rather than using more pressure. If you tear or crease the speaker cone, the party’s over!
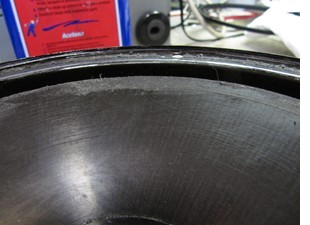
Around the rim of the basket there may be a plastic or cardboard ring over the foam edge. This must be removed. Use your putty knife or screwdriver to gently pry it away. If it’s cardboard, don’t worry too much about damaging it; replacement cardboard edges are easy to obtain. A plastic ring is proprietary and therefore breaking it would be problematic. So don’t do that.
Once you’ve removed the ring, pour a couple of ounces of acetone around the foam edge residue and let it soak in for a few seconds. Then start scraping away with your putty knife. The residue will stick to everything! Use more acetone to soften it, and wipe it away with a rag or paper towel. Repeat as often as necessary until you’ve removed almost all of the residue.
You don’t have to get every last bit. Remember, the new foam has thickness to it. Bits of residue no thicker than heavy stock paper, or beads no larger than a grain of sand will not be a problem.
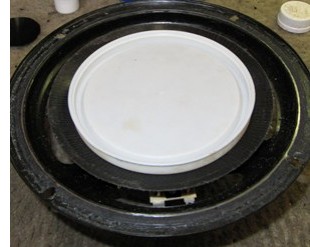
Step 3 – Draw a circle. Here’s where the lid or plate comes in. The purpose of the circle is to give you guidance to center the new foam. Choose a round object that is about 1 1/2 inches less diameter than the speaker cone. The new foam is going to overlap by a half inch or less. Remember, this is not rocket science, you can be an eighth of an inch off center and it will not be a problem. Trace around the perimeter with the magic marker.
Step 4 – Shim the voice coil. Carefully cut away the dust cap in the center of the speaker cone with a SHARP exacto knife or box cutter. Cut right at the perimeter to avoid damaging the voice coil, and don’t cut too deep or you’ll cut through the cone! In addition, I advise scoring a small (1/4″) radial line across the boundary between dust cap and cone, so you can tell exactly how the dust cap should be oriented when you glue it back on.
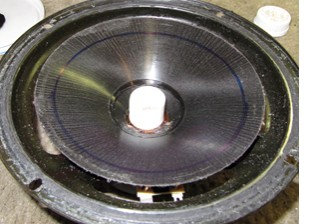
What to use for a shim? This is where the sheet of labels comes in. You need something that is of absolutely uniform thickness, but very thin. It must have a slick surface so it slides cleanly between the magnet and the voice coil. It must be flexible, yet rigid. So what you do is . . . you peel off the labels and throw them away, and then you use the waxed paper backing! Cut two pieces about two inches wide and long enough to wrap around the magnet exactly once, minus an eighth of an inch. Work the first strip down between the magnet and the voice coil. Work the second strip down between the magnet and the first strip, so that the eighth-inch gap is on the opposite side. Voila! Perfect shim!
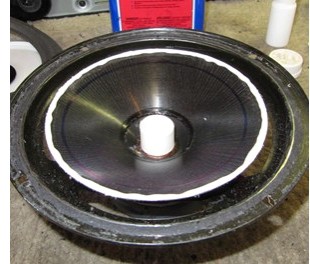
Step 5 – Lay a bead of glue around the perimeter of the speaker cone. Speaker repair glue is specially formulated to dry clear even though it’s white when wet, and remain flexible for years and years. Parts Express sells it in a 1 ounce bottle – just the right amount to repair one pair of small to medium sized woofers.
If you’re doing a pair of 15s or 18s, buy two. Don’t skimp on the glue!
Step 6 – Secure the new foam to the speaker cone. Carefully drop the new foam into place. Try to get it very close to right on the first try, so you don’t have to move it around once it’s hit the glue. If you do have to adjust its position, make sure you keep it a perfectly uniform circle. Be gentle!
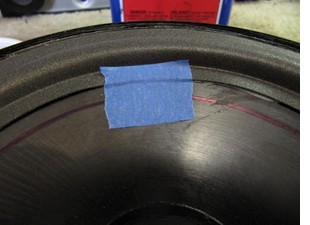
Once you’ve got it centered nicely, tap lightly all the way around the perimeter with your finger to get the glue to soak into the foam. Don’t press! Just tap. Tap tap tap. All the way around. Twice around. Three times. Glue is liable to ooze out along the inner edge of the foam. Don’t worry about it.
Now tear off (or cut) 12-20 two-inch strips of painter’s masking tape (larger speaker, larger number). Absolutely accept no substitutes! This stuff will not stick to the speaker glue, even after it begins to dry. This is most important! Apply the first piece of tape to overlap the inner edge of the foam, and very gently press it down to the foam. Next, make a
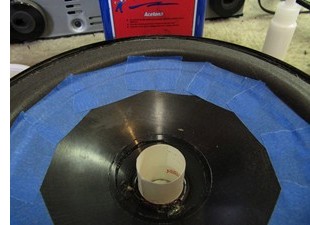
crease in the tape along the inner edge of the foam. Finally, press the tape down to the speaker cone. Once you’ve got it on there right, it will look like the photo above.
Work your way around the cone, overlapping each piece of tape with the previous one, making sure you get that tape to crease along the edge of the foam so you’ll get a nice, tight bond. When you’re done with the last piece, it will look like the photo at right.
Step 7 – Wait several hours. Depending on how much glue you used, and how warm it is in your work area, anywhere from 3 to 5 hours for the glue to get good and tacky.
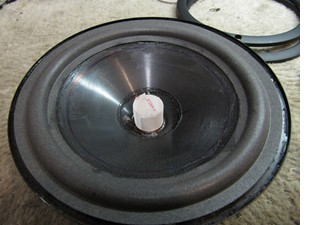
Step 8 – Remove the tape. Don’t just yank it off. Release one of the outer corners of the last piece you put on (it’s the one that’s on top at both ends). Peel it straight back, don’t pull it up. If you take off that first piece and the glue still seems wet, wait a while longer. Repeat for each piece of tape. They should come off without disturbing the foam or the glue. If you accidentally pull the foam up along the way , tap it back down. Tap tap tap. Put a piece of tape on that spot. You can take it off later.
Step 9 – Replace the outer ring. Lay a bead of glue around the inner edge of the speaker basket rim. You’ll have to lift up the outer edge of the foam to get it in
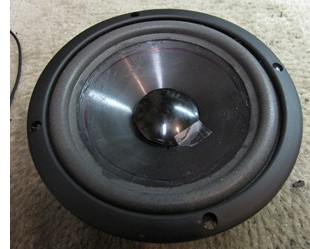
there, but that’s where you want it. Tap the foam down into place, like you did on the cone. Tap tap tap. Three times around. Then press the outer ring back down into place. Be sure to make the holes line up with the screw holes in the basket. Tape the dust cap to the speaker cone so you don’t get them mixed up in the next step. If your speaker had the cardboard type gasket, and you have to replace it, here’s where I get mine:
Caveat: MAT has a $25 minimum order. Workaround: they’ll fill an order for less, for an extra $3.50 service charge.
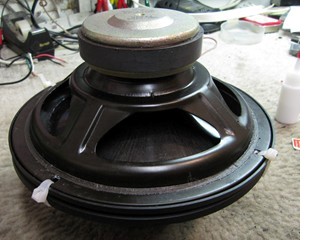
Step 10 – Overnight drying. . Turn one speaker upside down on top of the other. Put a nylon cable tie through each screw hole and tighten them down uniformly. Let dry overnight.
Step 11 – Remove shims and reglue dust cap. Pull straight up on the shims to get them out. Gently. At this point, press down on the speaker cone with your fingers on opposite sides. It should move freely without the voice coil rubbing against the magnet. Rotate the speaker 90 degrees and do it again. If there is any rubbing at all, you have to start all over again. But if you followed these directions carefully, I guarantee it will come out right!
Remember the score line from Step 4, right? Line up the score line on each dust cap
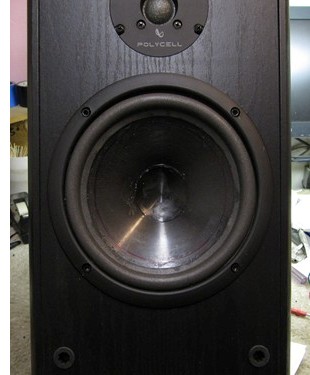
with the score line on the corresponding speaker cone. Then use a jeweler’s screwdriver or a dental pick to settle the dust cap close to its original position. Don’t worry about a tiny gap here and there. The glue will fill it in. Once you have it settled, lay a bead of glue around. Let it dry for a few hours.
Step 12 – Reinstall the speaker. If there was a gasket under the speaker, now is the time to put it back in. Then hook up the wires. Remember, it makes a difference which one goes where. Not a big difference, but a difference. Then line up the screw holes and screw it back down. Tighten all of the screws a little bit at a time to seat the speaker nice and evenly.
* I shouldn’t have said “easy”. It’s not really that easy. Sorry! But hey, now you know why StereoMan’s $35 per speaker charge is a real bargain!
![]()